


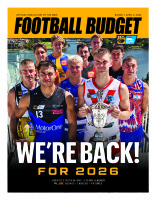
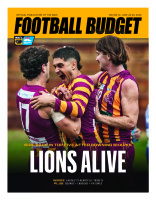
Football Budget - 2026


Ladder - League
- League
- WAFLW
- Reserves
- Colts
- Rogers Cup
- WAFL State
- WAFLW State
- Futures
- WAWFL
| Team Positions | P | W | L | PTS | % | ||
|---|---|---|---|---|---|---|---|
| 1 |  | Peel Thunder | 13 | 10 | 3 | 40 | 165.7 |
| 2 |  | Claremont | 13 | 8 | 5 | 32 | 126 |
| 3 |  | Boorloo | 13 | 8 | 5 | 32 | 115.34 |
| 4 |  | South Fremantle | 13 | 8 | 5 | 32 | 111.18 |
| 5 |  | East Perth | 13 | 7 | 6 | 28 | 106.79 |
| 6 |  | Subiaco | 12 | 6 | 6 | 24 | 107.88 |
| 7 |  | West Coast | 13 | 6 | 7 | 24 | 85.24 |
| 8 |  | Swan Districts | 13 | 5 | 8 | 20 | 90.66 |
| 9 |  | East Fremantle | 13 | 5 | 8 | 20 | 78.42 |
| 10 |  | West Perth | 12 | 1 | 11 | 4 | 58.42 |
| Team Positions | P | W | L | PTS | % | ||
|---|---|---|---|---|---|---|---|
| 1 | | Swan Districts | 14 | 12 | 2 | 48 | 200.55 |
| 2 | | Claremont | 14 | 12 | 2 | 48 | 177.15 |
| 3 | | East Fremantle | 13 | 8 | 5 | 32 | 92.76 |
| 4 | | South Fremantle | 13 | 7 | 5 | 30 | 102.27 |
| 5 | | Boorloo | 13 | 6 | 6 | 26 | 129.43 |
| 6 | | West Perth | 13 | 6 | 7 | 24 | 112.45 |
| 7 | | Subiaco | 13 | 6 | 7 | 24 | 109.02 |
| 8 | | East Perth | 13 | 2 | 11 | 8 | 51.11 |
| 9 | | Peel Thunder | 14 | 0 | 14 | 0 | 41.59 |
| Team Positions | P | W | L | PTS | % | ||
|---|---|---|---|---|---|---|---|
| 1 | | Swan Districts | 11 | 11 | 0 | 44 | 178.34 |
| 2 | | West Perth | 11 | 7 | 4 | 28 | 126.49 |
| 3 | | Peel Thunder | 12 | 7 | 5 | 28 | 122.01 |
| 4 | | East Perth | 11 | 7 | 4 | 28 | 121.45 |
| 5 | | Claremont | 12 | 6 | 6 | 24 | 111.14 |
| 6 | | Boorloo | 11 | 6 | 5 | 24 | 99.4 |
| 7 | | South Fremantle | 12 | 5 | 7 | 20 | 93.79 |
| 8 | | Subiaco | 11 | 2 | 9 | 8 | 76.31 |
| 9 | | East Fremantle | 11 | 0 | 11 | 0 | 39.49 |
| Team Positions | P | W | L | PTS | % | ||
|---|---|---|---|---|---|---|---|
| 1 | | South Fremantle | 12 | 10 | 2 | 40 | 144.34 |
| 2 | | Claremont | 12 | 9 | 3 | 36 | 128.07 |
| 3 | | East Fremantle | 11 | 8 | 3 | 32 | 149 |
| 4 | | West Perth | 11 | 6 | 5 | 24 | 107.44 |
| 5 | | Swan Districts | 11 | 4 | 7 | 16 | 95.61 |
| 6 | | Subiaco | 11 | 4 | 7 | 16 | 93.7 |
| 7 | | Peel Thunder | 12 | 4 | 8 | 16 | 80.84 |
| 8 | | Boorloo | 11 | 4 | 7 | 16 | 66.62 |
| 9 | | East Perth | 11 | 2 | 9 | 8 | 65.81 |
| Team Positions | P | W | L | PTS | % | ||
|---|---|---|---|---|---|---|---|
| 1 | | Swan Districts | 14 | 12 | 2 | 48 | 168.69 |
| 2 | | East Fremantle | 13 | 11 | 2 | 44 | 217.5 |
| 3 | | Claremont | 14 | 10 | 4 | 40 | 103.94 |
| 4 | | Subiaco | 13 | 8 | 5 | 32 | 118.66 |
| 5 | | Boorloo | 13 | 7 | 6 | 28 | 126.02 |
| 6 | | South Fremantle | 13 | 5 | 8 | 20 | 103.12 |
| 7 | | West Perth | 13 | 5 | 8 | 20 | 93.86 |
| 8 | | Peel Thunder | 14 | 1 | 13 | 4 | 55.33 |
| 9 | | East Perth | 13 | 1 | 12 | 4 | 30.33 |
| Team Positions | P | W | L | PTS | % | ||
|---|---|---|---|---|---|---|---|
| Team Positions | P | W | L | PTS | % | ||
|---|---|---|---|---|---|---|---|
| Team Positions | P | W | L | PTS | % | ||
|---|---|---|---|---|---|---|---|
| 1 | | East Fremantle | 8 | 7 | 0 | 30 | 375.69 |
| 2 | | West Perth | 7 | 5 | 2 | 20 | 116.84 |
| 3 | | South Fremantle | 8 | 4 | 3 | 18 | 133.69 |
| 4 | | Subiaco | 8 | 4 | 3 | 18 | 112.66 |
| 5 | | Boorloo | 8 | 4 | 3 | 18 | 85.84 |
| 6 | | Peel Thunder | 7 | 4 | 3 | 16 | 126.4 |
| 7 |  | South West Talent Academy | 7 | 3 | 4 | 12 | 81.48 |
| 8 | | East Perth | 7 | 2 | 5 | 8 | 69.31 |
| 9 | | Claremont | 7 | 1 | 6 | 4 | 54.88 |
| 10 | | Swan Districts | 7 | 1 | 6 | 4 | 52.11 |
| Team Positions | P | W | L | PTS | % | ||
|---|---|---|---|---|---|---|---|


Item 1 of 5